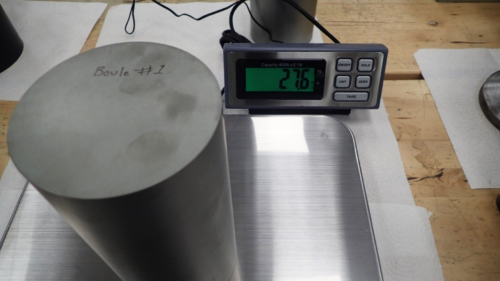
Figure 1: Germanium boule weighing 27.6lbs.
Germanium (Ge) is an IR material with physical properties that make it ideal for aerospace and defense applications, among others. Using advanced crystal growth methods, Germanium boules can be produced, from which germanium lens and domes are manufactured. Because Germanium is an expensive material, it is imperative to generate blanks from the boules in a cost-effective manner.
By utilizing OptiPro 5-axis optical grinding machines, the method of scoop-grinding can effectively remove large pieces of material when creating dome blanks that would then be recycled. Once scoop-ground, the domes are processed using the same technology for spherical lenses: spherically generating the surface to the desired radius, then CNC high speed polishing the surface to desired irregularity and surface roughness.
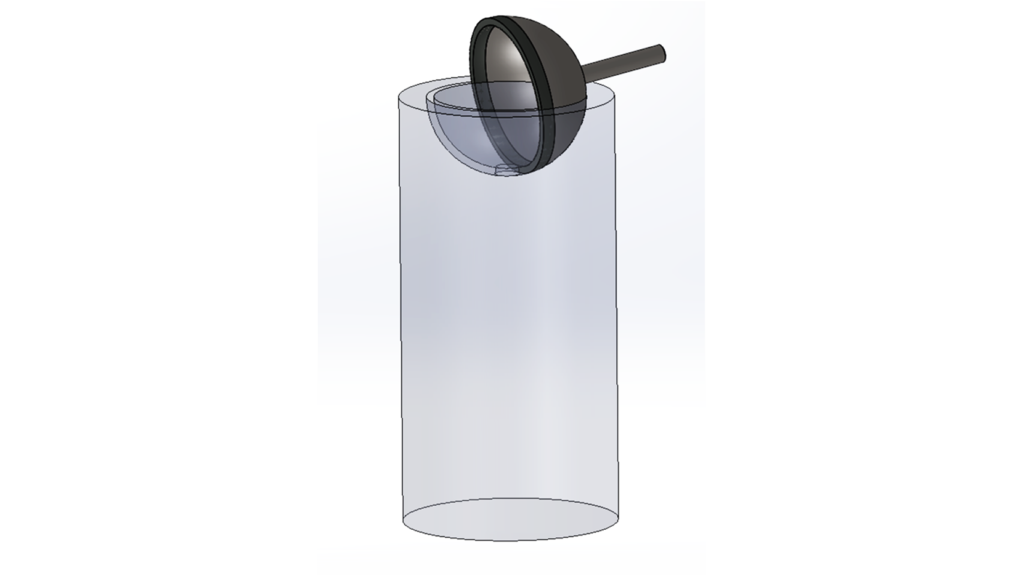
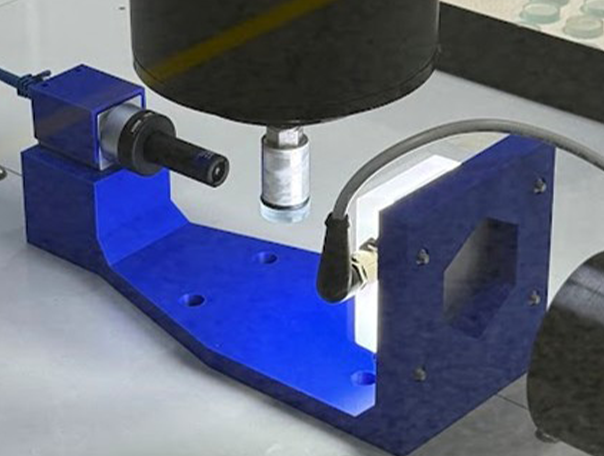
Figure 2: Rendered image displaying how a scooping tool generates material from a boule.
Below is the process for manufacturing germanium hemispherical domes out of a boule sized 4.5″ wide by 9.0″ tall (see figure 1).
CNC Scoop Machining to Minimize Material Costs
CNC scoop machining, or scoop-grinding, was developed with recycling and material conservation in mind (see figure 2).
This machine operation enables you to remove bulk pieces from a raw cylinder of material in a manner that allows you to recycle the material being removed. What remains after removing the bulk pieces of material is a complete near-net dome blank (see figures 3 and 4).
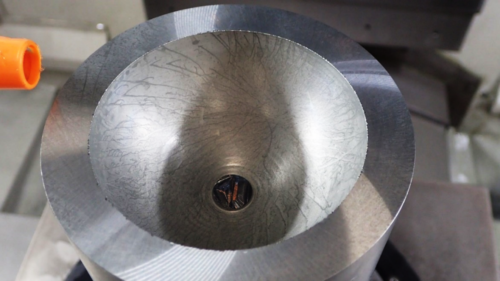
Figure 3: Germanium boule after concave scoop-grinding.
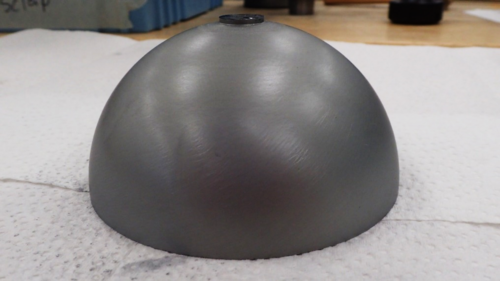
Figure 4: Convex surface of a scoop-ground germanium dome blank removed from the boule.
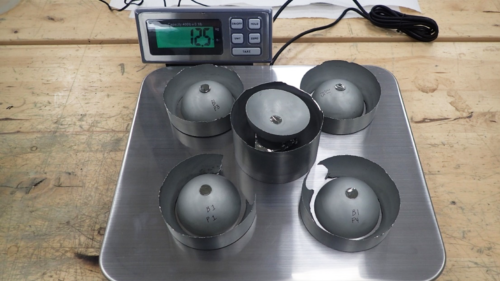
Figure 5: Net weight of scrap material from processing of the germanium boule.
Recycling Germanium Scrap Material
After scoop-grinding germanium dome blanks, the scrap pieces can then be recycled to save on costs and maximize return on investment. To examine the recyclable material net yield, it is necessary to measure and record the combined weight of all the scrap pieces and compare that to the weight of an unprocessed germanium boule. As shown in Figure 5, a digital scale is used to weigh the scrap material. With this information, the percentage of material that was recovered for recycling can be calculated.
Producing Germanium Domes with Precision
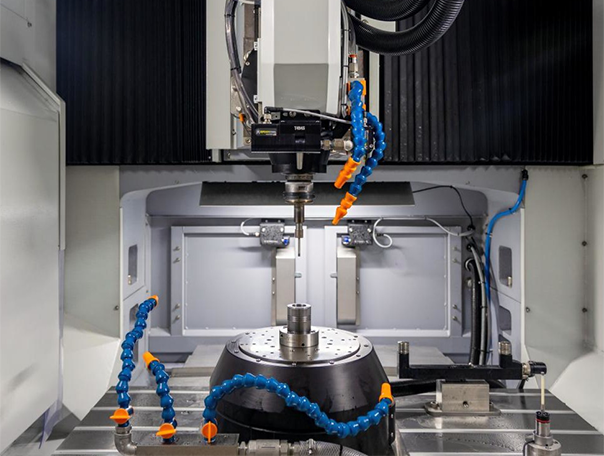
Prior to high speed polishing the germanium domes, the surfaces are spherically generated on a 5-axis optical grinding machine (see figure 6). This step is crucial for the following reasons:
- To bring the dome to the desired and necessary radius
- To ensure the dome is completely spherical with no astigmatic error
- To minimize subsurface damage by finishing the surface with a fine-grit tool
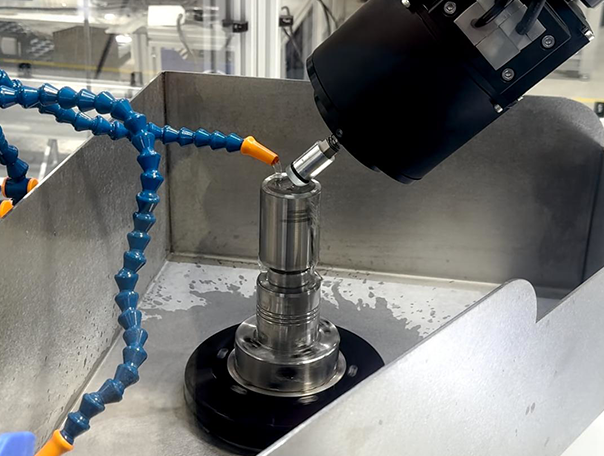
Once the germanium dome is spherically generated to the desired specifications, the convex and concave surfaces can be high speed polished on a machine such as the PRO 160P+ using a known recipe of consumables and polishing parameters (see figure 7).
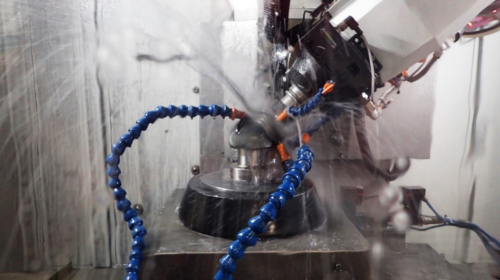
Figure 6: A germanium dome being spherically generated in the eSX 300.
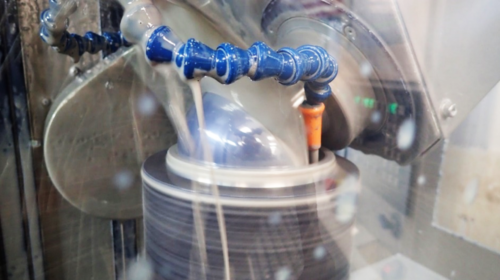
Figure 7: Germanium dome high speed polishing in the PRO 160P+.
The finished germanium dome surfaces can be seen below in figures 8 and 9.
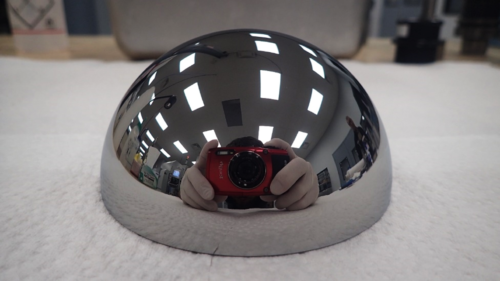
Figure 8: A finished germanium dome convex surface.
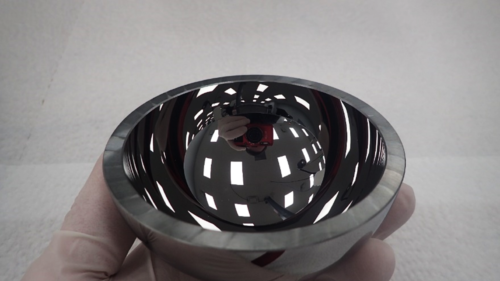
Figure 9: A finished germanium dome concave surface.
Accurate Metrology of Germanium Domes
To ensure that each germanium dome has met the required specifications, several different metrology tools are required.
The following instruments were used to measure the finished dome surfaces:
- Part Thickness: Digital Drop Gauge
- Part Radius:
- OptiPro PRO Tower™
- OptiPro UltraSurf™
- Part Irregularity
- OptiPro PRO Tower™
- OptiPro UltraSurf™
OptiPro’s UltraSurf™ is a 4 or 5-Axis non-contact metrology system capable of measuring everything from symmetric, asymmetric and freeform optical components. With the availability of numerous compatible optical sensors, the UltraSurf™ can measure a variety of materials including metals, ceramics, crystals and optical glasses.
OptiPro’s PRO Tower™ is a vertical interferometer system for measuring both the radius and wave front error of spherical and plano optics of up to 300mm in diameter. With an optional CGH (Computer Generated Hologram) stage available, the PRO Tower™ can accommodate aspheric optics as well.
Final metrology of two germanium domes high speed polished at OptiPro are shown in the table below and in figures 10, 11, 12, 13. The PRO Tower™ was used with an F0.65 objective to measure the concave (R1) dome surfaces. This allowed capture of the full clear aperture of the concave surface. The UltraSurf 4X 300 was used to capture 100% of the polished convex (R2) surfaces.
| Dome # | R1 Radius (mm) | R2 Radius (mm) | R1 Irregularity (FR) | R2 Irregularity (FR) | CT (mm) |
| 1 | 44.458 | 50.796 | 3.285 | 2.688 | 6.361 |
| 2 | 44.470 | 50.797 | 3.001 | 2.311 | 6.349 |
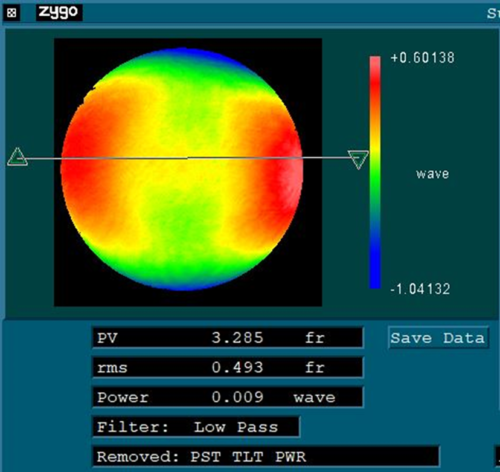
Figure 10: Surface map of germanium dome #1 concave surface.
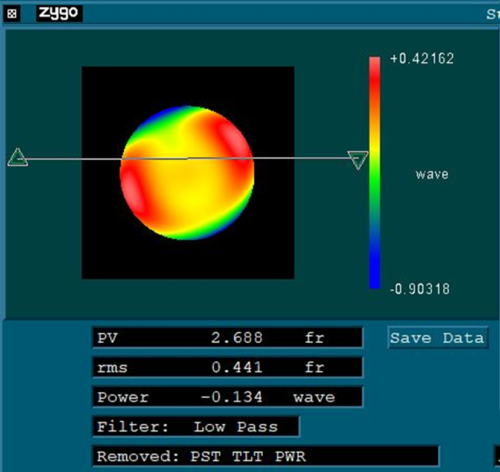
Figure 11: Surface map of germanium dome #1 convex surface.
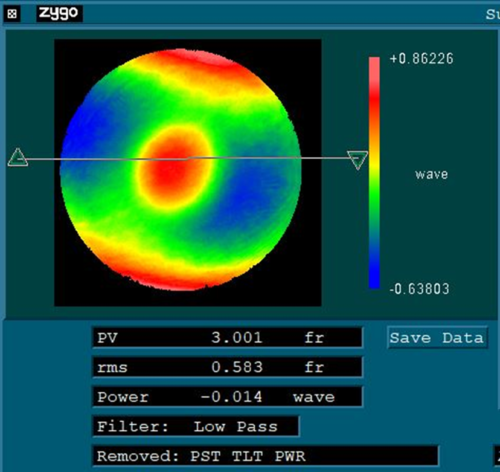
Figure 12: Surface map of germanium dome #2 concave surface.
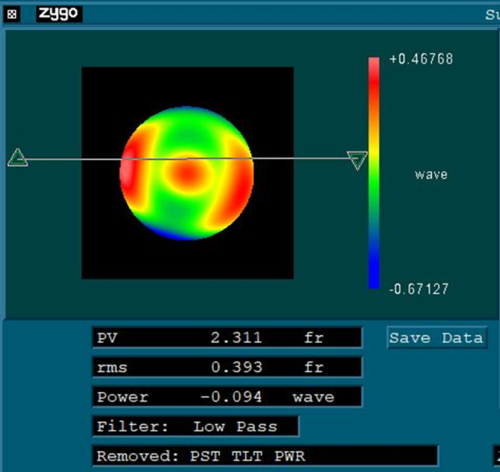
Figure 13: Surface map of germanium dome #2 convex surface.
Multiple surface roughness measurements were performed on both of the finished domes showing an average value of 24Å RMS. Figures 14 and 15 shows a couple examples of the surface roughness on each dome.
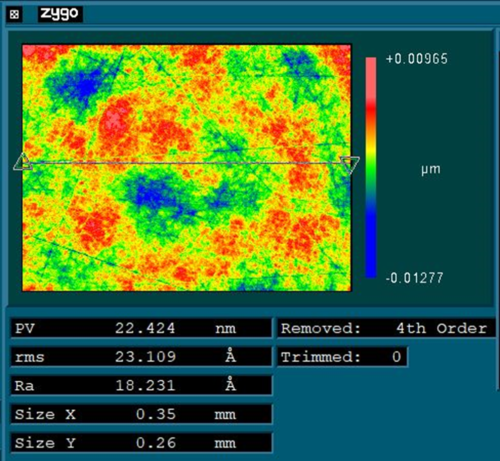
Figure 14: Surface roughness of germanium dome #1.
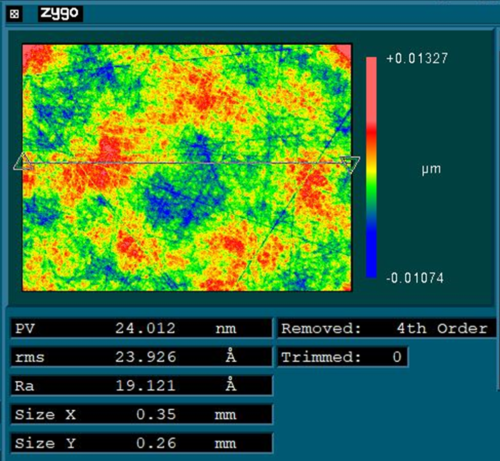
Figure 15: Surface roughness of germanium dome #2.
Summary
OptiPro has developed a turnkey solution to manufacture hemispherical germanium domes utilizing the latest optical manufacturing technology. By using the scoop-grinding method in the manufacturing process of germanium domes, a large portion of the germanium material that is typically lost in the conventional manufacturing process would be subsequently salvaged and recycled to save on cost.
OptiPro’s CNC optical grinding machines can generate convex and concave spherical surfaces to the desired radius with minimal subsurface damage. To achieve optimal irregularity and surface roughness, high speed polishers like the PRO 160P+ are ideal solutions when a known recipe of consumables and parameters are utilized.
Once the dome surfaces are polished, it is critical to use reliable metrology instruments to generate accurate measurement data. OptiPro’s PRO Tower vertical interferometer and UltraSurf non-contact metrology system are industry-standard methods to measure irregularity, surface roughness, and other important specifications that will ensure optimal performance. Because germanium lenses and domes are often utilized in critical applications such as aerospace and defense, performance is paramount.
The same OptiPro technology utilized to generate and polish germanium hemispherical domes can be applied to germanium lenses as well. If you have a job that involves prototype through high volume production of a germanium lens or dome, reach out to OptiPro today and let us optimize your manufacturing process.


